How to Photograph Wedding Details: Rings, Flowers, and Decor
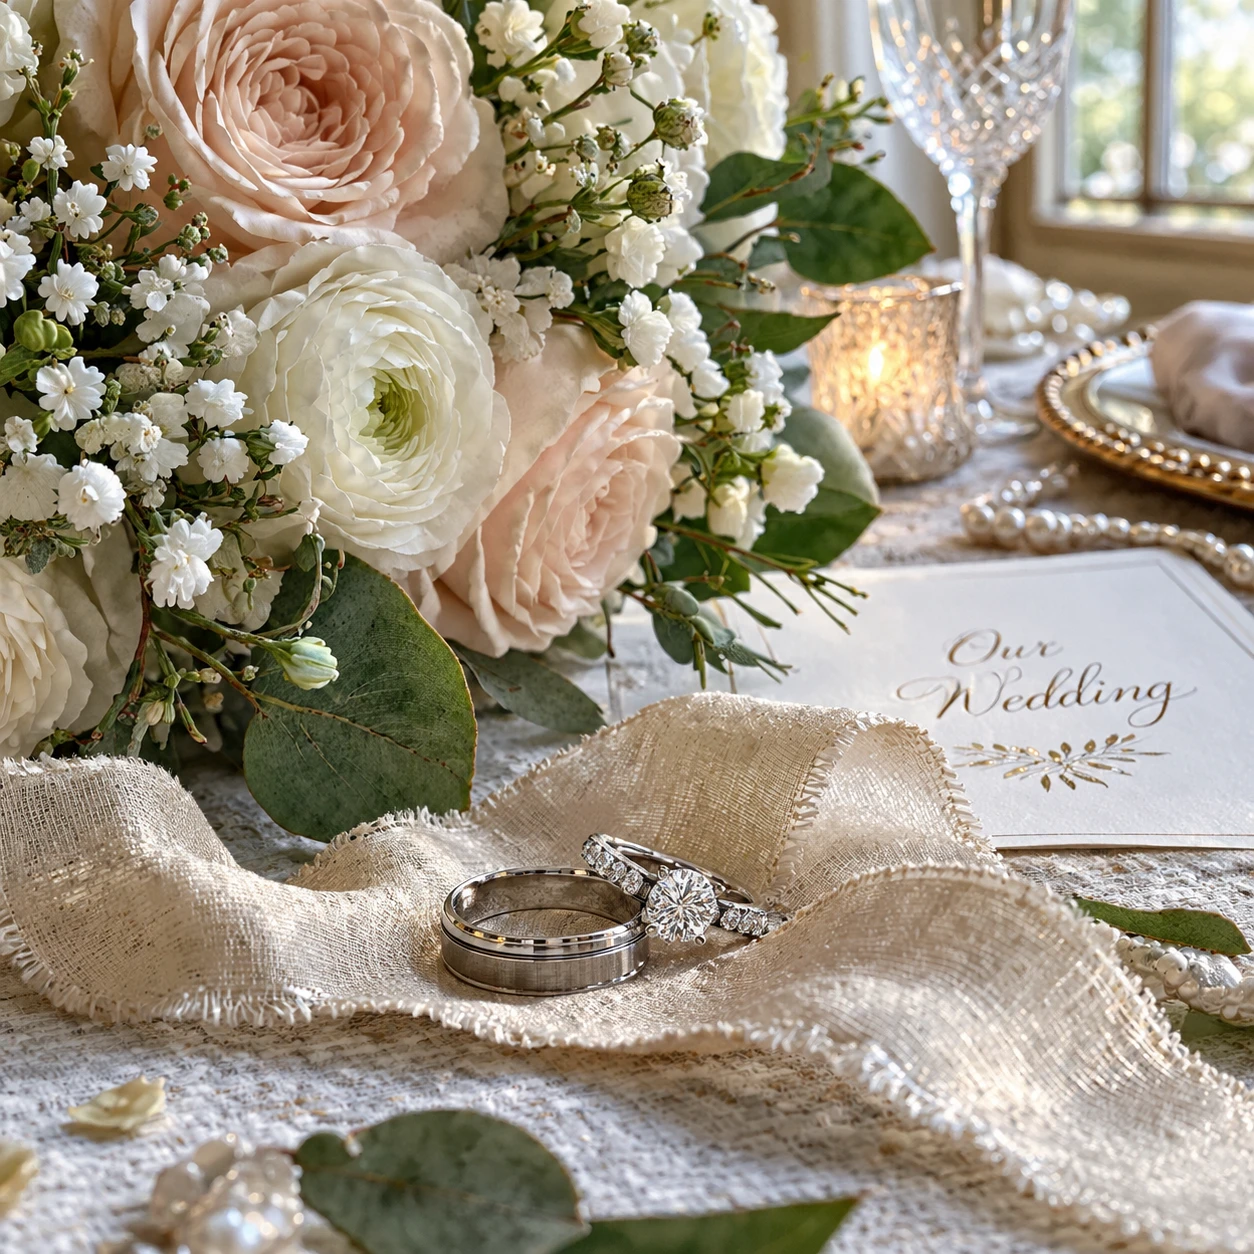
Wedding detail photography preserves the small choices that give a celebration its character: the rings, the bridal bouquet, handwritten stationery, and carefully arranged decor. Strong images come from noticing those details, finding flattering light, and giving each subject enough space to read clearly.
Whether you are photographing a wedding professionally or documenting a loved one’s day, work calmly and with permission. A few deliberate frames of each item will tell a richer story than a rushed collection of near-identical close-ups.
Start with a detail-shot plan
Make a short detail-shot plan before the wedding day, and photograph meaningful items while the room is still calm. This helps you cover the essentials without interrupting preparations or missing small personal touches.
Ask the couple or planner which objects matter most. Start with the wedding rings, bridal bouquet, invitation suite, shoes or accessories, and distinctive wedding decor. Add personal items such as a family heirloom, a ceremony program, or a place card if they have a story behind them. The goal is to record meaning, not to photograph every object in the room.
Set aside a brief window before the schedule gets busy. Confirm where the rings and flowers will be, and keep the photographed items together only with the couple’s or planner’s approval. Avoid moving fragile arrangements or anything that has already been placed for the ceremony.
- Prioritize: List the three to five details the couple most wants remembered.
- Look for connections: Pair related items, such as rings with invitation paper or bouquet ribbon.
- Plan a backup: If a room is crowded, choose a nearby uncluttered surface rather than forcing a shot in place.
A plan gives you direction, but leave room for discoveries. A small detail not mentioned in advance may become one of the most personal photographs in the gallery.
Find flattering light
Soft, indirect natural light is usually the easiest light for wedding detail photography. Place small objects near a window, then adjust their position until highlights look gentle and colors remain believable.
Direct sun can create hard shadows, bright glare on polished metal, and uneven exposure across a bouquet. If sunlight is harsh, move the setup farther from the window or use a sheer curtain to soften it. Turn off nearby room lights when they add a strong yellow or green cast; mixing color temperatures can make white flowers and stationery difficult to render naturally.
When there is no useful window, look for clean available light from a shaded doorway or a well-lit interior area. A small white card can reflect light back into the shadow side of a ring or bloom. Keep the reflector just outside the frame and check that it does not create a distracting bright patch.
Watch the reflections as well as the subject. Rings and glass decor can mirror windows, hands, or camera gear. Shift your angle a little at a time, or use a larger soft light source so reflections appear broad and controlled. Flash can work in a dark venue, but direct on-camera flash often flattens texture and produces sharp glare. Use it only when available light cannot do the job, and soften or bounce it where possible.
Photograph rings with care
Photograph wedding rings on a clean, stable surface with one clear focal point. Remove fingerprints first, then focus precisely on the most important edge or engraving.
Metal shows every smudge and nearby reflection, so handle rings by their edges and give them a quick polish with a clean, lint-free cloth. Choose a setting that supports the story without competing: invitation paper, a ribbon from the bouquet, or a simple piece of fabric can add context. Keep the surface level and secure, especially if the rings are resting on a small object.
For a classic ring photograph, arrange the bands so their shapes are easy to distinguish rather than tangled together. Turn an engraved detail toward the camera if it is important. Make several frames while changing your angle slightly; even a small shift can remove a distracting reflection or reveal more of the ring’s profile.
Focus matters more than extreme background blur. A very shallow depth of field can leave part of a pair of rings soft, so stop down enough to keep the meaningful surfaces sharp. Review the image at full size and check the prongs, lettering, and nearest edges. If the rings keep rolling, use a stable surface or a discreet support that will not show in the final frame.
Capture flowers with texture and shape
Photograph a bridal bouquet as both a complete arrangement and a collection of individual textures. Start with its overall shape, then move closer to show petals, greenery, ribbon, and distinctive blooms.
Hold or place the bouquet against a background that separates it from the surroundings. A plain wall, soft fabric, or open patch of greenery can help the flower colors stand out. Watch for stems, bags, and other objects entering the edges of the frame. If the bouquet is being held, ask the attendant to turn it slowly until the blooms face the light and the ribbon falls naturally.
Look for the bouquet’s structure: its outline, the way colors repeat, and how foliage frames the flowers. A close-up of one bloom can show delicate edges and texture, while a medium view communicates scale and arrangement. Keep enough depth of field to describe the bouquet; blur can be attractive, but excessive blur may make the flowers look like an indistinct patch of color.
Flowers can wilt or shift as the day progresses, so photograph the bouquet early when possible. If the venue is dark, move to a brighter nearby spot with permission rather than using a cluttered corner. Preserve the natural color of the flowers by avoiding mixed light and checking exposure on pale petals, which can lose detail when highlights are too bright.
Make decor feel intentional
Photograph wedding decor by showing both its design and its place in the celebration. Use clean spacing, balanced edges, and a clear visual subject in each frame.
For stationery, straighten menus and place cards, then align their edges or create a deliberate, relaxed arrangement. A ribbon, flower, or ring can add context, but each prop should support the main item. If the scene starts to feel crowded, remove one object and reassess. That small edit often makes the design easier to read.
Table details need a different approach. Photograph a centerpiece or place setting close enough to reveal texture, then step back for a wider view that shows how the decor works together. Check that cutlery, glassware, candles, and florals do not merge into a distracting tangle. A slight change in camera height may separate overlapping shapes and make the arrangement feel more orderly.
Use the venue’s character where it adds context: a distinctive table surface, architectural detail, or ceremony backdrop can help locate the celebration in the gallery. Still, keep the subject legible. Intentional styling means editing the frame, not removing every sign that a real wedding took place.
Refine composition and focus
Refine wedding detail composition by choosing a clear subject, simplifying the background, and checking focus and exposure before you move on. Small changes in framing often improve an image more than adding extra props.
Look at the corners and edges for stray items, bright spots, or lines that pull attention away. Move the subject, change your position, or crop more tightly to remove distractions. For a balanced frame, use negative space around a ring or invitation rather than filling every gap. When working with repeating decor, align the pattern carefully or make the repetition an obvious part of the composition.
Vary the framing so the final set does not feel repetitive:
- Close-up: Show a ring engraving, petal edge, or paper texture.
- Medium frame: Include a bouquet or stationery arrangement with a little surrounding context.
- Wide view: Place decor within the room or table setting to show scale and atmosphere.
Before leaving each setup, review a frame at full size. Check that the intended detail is sharp, highlights retain texture, and the background is not pulling the eye. If the subject has depth, take another frame with a little more depth of field rather than trusting one narrow-focus shot.
Build a cohesive gallery
A cohesive wedding detail gallery combines close-ups with wider context photographs. Together, they show what the objects looked like and how they belonged to the wedding day.
Think of the set as a short visual sequence: establish the venue or table, show the arrangement, then reveal a meaningful close-up. For example, a wide reception-table frame can lead into a centerpiece photograph and finish with a close view of the menu beside a place card. The images feel connected through repeated colors, materials, or light, even when the subjects differ.
Keep variety purposeful. If every photograph uses the same angle and shallow focus, the gallery can feel flat. Change distance, height, and orientation while retaining a consistent approach to color and exposure. Include a few imperfect, truthful details when they add character, but avoid frames where clutter overwhelms the subject.
In the final selection, favor photographs that contribute something distinct: a personal connection, a useful sense of place, a revealing texture, or a strong composition. That edit turns a record of objects into a visual account of the couple’s choices and the atmosphere they created.
Frequently asked questions
These quick answers cover common choices for photographing wedding details in different settings and with different equipment.
What lens works well for wedding detail photography?
A macro lens makes it easier to fill the frame with rings, engravings, and flower textures, while a standard or short telephoto lens is useful for bouquets and decor with more context. Choose a lens that lets you work comfortably in the available space; a macro lens is helpful, but it is not essential.
How do you photograph rings without reflections?
Clean the rings, use soft light, and change your camera or ring angle until distracting reflections move away. Polished metal cannot be made reflection-free in every setting, so aim for controlled, attractive reflections rather than a lifeless surface.
When should wedding details be photographed?
Photograph rings, flowers, and personal items before the schedule becomes crowded, often during the preparation period. Capture reception decor once it is fully set and before guests arrive, if timing and access allow.
How can you use a phone to photograph wedding details?
Clean the phone lens, tap the main subject to focus, and use soft window light. Move closer only while the image stays sharp, simplify the background, and avoid digital zoom when possible. Take both a close-up and a wider frame for context.