Working with Challenging Lighting at Indoor Wedding Venues
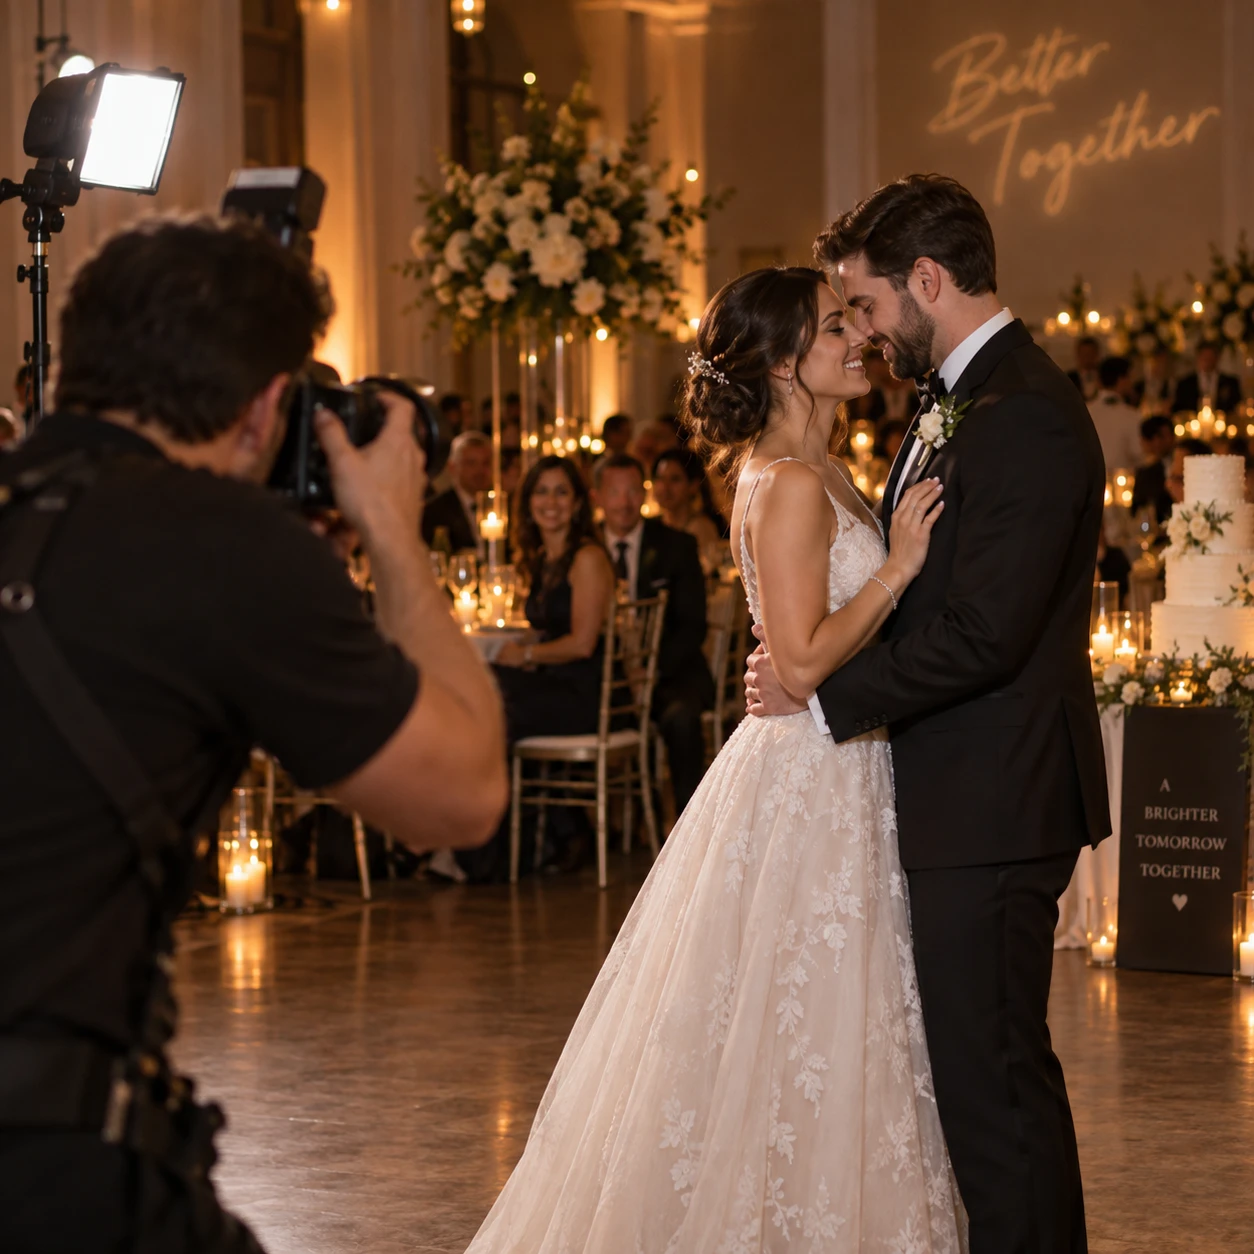
Indoor wedding venues can shift from soft window light to dim tungsten lamps, colored DJ uplighting, and near-dark dance floors in a single day. The key is to read the room, choose settings for the moment, and add light only when it improves the photograph without erasing the venue’s atmosphere.
Assess the venue light before the wedding begins
To assess an indoor wedding venue, identify its light sources, color casts, reflective surfaces, and the positions from which you can photograph safely. A quick walkthrough helps you anticipate where ambient light will work and where you may need flash.
Start by checking the ceremony space, reception room, and any connecting areas where important moments may happen. Notice whether daylight enters through windows, whether overhead fixtures are warm or cool, and whether LED uplighting changes color across the walls. Mixed lighting means different sources cast different colors in the same frame; a face near a window may look blue while the background looks orange.
Look up as well as around. A white or pale ceiling can make a useful surface for bounce flash, while a dark wooden ceiling may absorb light or add an unwanted color cast. Mirrors, glossy walls, and glass can reflect flash into the frame. Choose a few shooting positions that keep these reflections out of your images and give you a clear view without blocking guests.
If possible, take a test frame from the ceremony aisle and from the reception dance floor. Check how the background renders, not only whether a face looks bright. Good venue assessment is about light direction and color as much as brightness. Make a mental note of the changing conditions; a room may look very different after curtains close or the DJ turns on the uplighting.
Choose camera settings for dim interiors
For dim indoor wedding photography, balance aperture, shutter speed, and ISO according to the subject’s movement and the available light. There is no single setting that works for every venue or moment.
Use a wider aperture, such as f/1.8 or f/2.8, when you need more light and want to separate a subject from a busy background. At very wide apertures, focus becomes less forgiving, especially for a couple moving toward you or a row of people at different distances. Stop down when you need more depth of field for group portraits.
Choose shutter speed based on motion. A still portrait may tolerate a slower speed than a processional, a speech gesture, or dancing. If people are moving and you see blur, raise the shutter speed before relying on image stabilization; stabilization can reduce camera shake, but it cannot freeze a moving subject. When shutter speed and aperture are already at practical limits, increase ISO rather than accept a missed moment. Modern cameras can often produce usable files at higher ISO, while slight grain is usually preferable to motion blur.
Review exposure on the camera display and histogram, especially when a dark room makes the screen appear brighter than the file. Exposure compensation helps when using an automatic exposure mode: add exposure if the camera renders a white dress too dark, or reduce it if bright windows or spotlights are blowing out. Protect important highlights, but expose for the people and moment you need to preserve.
Manage mixed and colored light
Manage mixed and colored light by deciding which source should define the subject’s color, then setting white balance or adding corrective light to support that choice. A single white-balance setting cannot make every light source neutral when the room contains several colors.
Auto white balance is convenient when conditions change quickly, but it can shift between frames as the camera sees different amounts of uplighting or window light. A fixed Kelvin setting or a custom white balance can make a sequence more consistent, though it may need adjustment when you move to another part of the venue. Shooting RAW gives you more flexibility to refine white balance later, but it does not remove strong color casts from faces.
For a ceremony beside windows, daylight may be the cleanest source for skin tones. In a reception lit by warm tungsten fixtures, a warmer overall look may feel natural; forcing everything to neutral can strip away the room’s character. LED uplighting presents a tougher choice. Saturated magenta, blue, or green light can tint skin in ways that are difficult to correct, so change your angle, wait for a different lighting cue, or use a neutral flash contribution on the subject when appropriate.
Keep the room’s color where it adds atmosphere, and avoid letting it overwhelm faces. A test portrait under the actual light can reveal whether the color is flattering before the dance floor fills. Consistency across a moment often matters more than perfect neutrality in every corner of the frame.
Use flash without losing the atmosphere
Use bounce flash when the room has a suitable reflective surface, and consider off-camera flash when you need more control over light direction. Both methods can lift faces while leaving ambient light visible, provided you balance flash with the room rather than overpower it.
Bounce flash directs light toward a pale ceiling or wall, creating a broader, softer source than a bare flash pointed at a person. Before using it, check the surface: a high, dark, or strongly colored ceiling may waste light or tint the result. Adjust the flash head toward a nearby neutral surface, and take a test frame to confirm that the bounce actually reaches your subjects.
Off-camera flash gives you more control over direction and can add shape to a portrait or dance-floor scene. A flash placed to the side of the couple can create dimension, but stands and light modifiers take space and may become a hazard in crowded rooms. Keep equipment out of walkways, coordinate with the venue and planner, and avoid blocking guests’ views.
To preserve ambience, expose for the background first, then add only enough flash to give faces a clean lift. A slower shutter can retain more ambient light, but it also records more motion; test this trade-off during a quiet moment before the action begins. Flash should support the scene, not make the room look as though it was lit in a studio.
Adapt your approach to key wedding moments
Adapt your lighting technique to the movement, setting, and importance of each wedding moment. Ceremony, speeches, dancing, and group portraits need different balances of ambient light and flash.
- Ceremonies: Keep your setup discreet and avoid sudden bursts if the couple or officiant has asked for a no-flash ceremony. Use a wide aperture and a shutter speed that can handle the processional; raise ISO as needed. Take care not to change exposure so aggressively that bright windows erase detail in a dress.
- Speeches: Find a position with a clean background and enough room to use bounce flash if needed. Watch for hand gestures and reactions, not just the person holding the microphone. A slightly wider frame can preserve the couple’s response and the room’s context.
- Dancing: Let the DJ lighting contribute to the energy, but watch for colored beams landing across faces. Use a shutter speed that records the movement you want; a little motion can feel lively, while too much turns expressions into blur. Flash can freeze a moment against a softer ambient background.
- Group portraits: Move people away from strongly colored walls when possible and check that everyone is in the focus plane. Use enough depth of field for the rows, then add bounced or off-camera flash if ambient light is uneven.
For any key moment, keep a practical backup position in mind. A photographer who has to cross the room to fix a lighting setup may miss the exchange of rings or a spontaneous embrace.
Prepare for lighting problems and common mistakes
Prepare for indoor lighting problems by carrying a simple backup plan and checking exposure, focus, and flash behavior before the room gets busy. A few deliberate checks can prevent blown highlights, motion blur, and harsh flash from undermining important images.
- Relying on one exposure setting all day: Photographers may stick with ceremony settings after the room changes. That can produce dark reception images or clipped highlights. Recheck exposure whenever you move between rooms or the lighting changes.
- Using a shutter speed that is too slow: A dim display can make a slow exposure seem acceptable, but moving people will blur. Review faces at playback and raise shutter speed when expressions or gestures are soft.
- Pointing flash directly at guests by default: Direct flash can flatten faces, create sharp shadows, and make the background disappear. Bounce from a neutral surface or move the flash off camera when space and timing allow.
- Ignoring colored light on skin: Strong LED uplighting can create patches that are difficult to repair later. Shift your angle, use a cleaner light source on faces, or wait for a more flattering lighting change.
Keep spare batteries and memory cards accessible, and check that your flash can recycle at the pace the moment demands. A backup body or second lighting option may be useful for professional coverage, but no amount of gear replaces a fast fallback: raise ISO, find a better angle, and keep photographing.
Practice and refine your indoor lighting workflow
Refine your indoor lighting workflow by taking test shots, reviewing them consistently, and adjusting when the room or schedule changes. A repeatable routine reduces guesswork while leaving room for the unpredictable parts of a wedding.
Before guests arrive, photograph a person or assistant in the ceremony and reception spaces at the exposure you expect to use. Check skin tone, background detail, shutter speed, and focus at full playback rather than judging only the thumbnail. If you use flash, test both the direction and power level; colored ceilings and long distances can make a setup behave differently than expected.
During the day, use a short reset when moving locations: identify the dominant light, choose a starting exposure, take a frame, and inspect the result. If the DJ changes the uplighting or the couple moves into a darker part of the room, reassess instead of trusting settings from the previous scene. This quick loop—read, expose, review, adjust—keeps your decisions grounded in the light you actually have.
Build confidence by practicing in venues with different ceiling heights, wall colors, and window arrangements. The goal is not to eliminate every imperfection. It is to make fast, considered choices that keep people recognizable, moments sharp enough to feel present, and the atmosphere true to the celebration.